As beauty trends come and go, one particular makeup application technique has stood the test of time: highlighting. Although the days when over-highlighting are long gone, natural-looking highlighter application is still in, because a glazed, luminous skin is timeless.
Today, we want to share some valuable tips specifically for beginners, as applying highlighter correctly can make your overall makeup look better, but on the contrary, it can ruin it.
Therefore, it’s essential to understand the best practices and techniques when incorporating highlighter into your routine.


What are Makeup Highlighters Used For?
Imagine that radiant glow on someone’s face, where the light hits their skin and creates a captivating allure. You’d think that’s because they’re making the most out of the right moisturizer.
The secret to that is not just good skincare (although the significance of a makeup primer is inevitable) —it’s the magic of highlighter!
Highlighter is that one makeup product that helps with attracting light and enhancing a natural-looking face lift, also used to accentuate your facial features.
Subscribe to our newsletter:
Thanks for signing up.
The Different Highlighter Formulas
There are multiple highlighter formulas in the market, but one can’t be distinguished from another, since every skin tone, and every makeup look ever asks for different product consistencies and build up. Here we have listed the 5 different highlighter formulas:
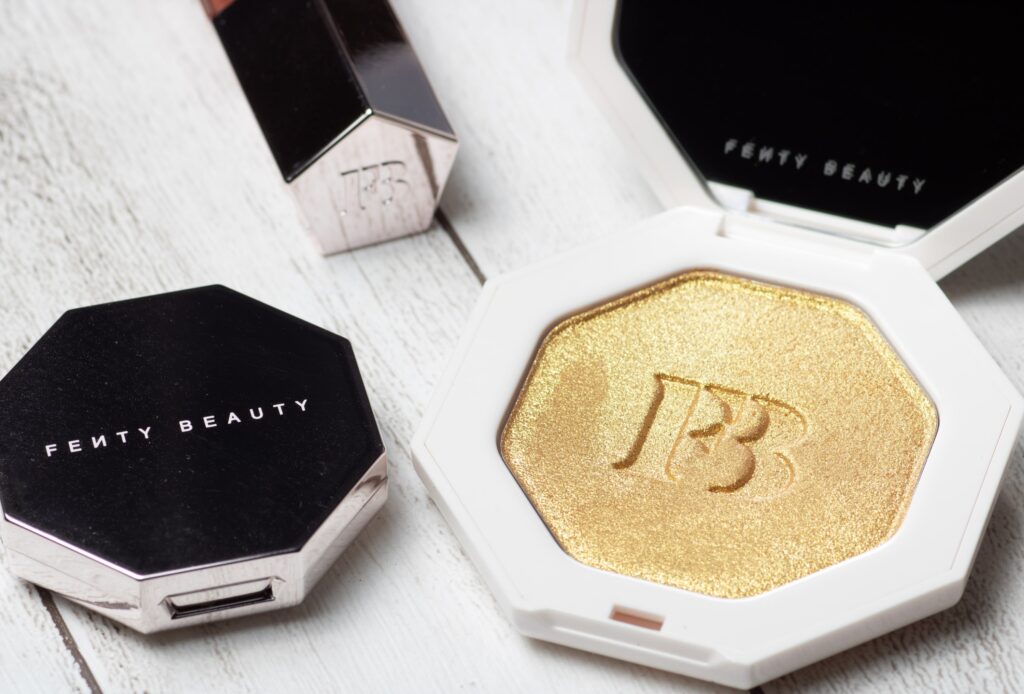
- Powder Highlighter: This is the most common and versatile type of highlighter. It comes in a pressed powder form and provides a soft, buildable glow. It’s easy to apply and works well for all skin types.
- Cream Highlighter: Cream highlighter comes in a creamy, balm-like texture. It gives a natural, dewy finish and is ideal for those with dry or mature skin. It can be applied with fingers or a brush for a subtle, lit-from-within glow.
- Liquid Highlighter: Liquid highlighter has a lightweight, fluid consistency. It blends seamlessly into the skin, giving a radiant and luminous finish. It can be mixed with foundation or applied on top for a more intense glow.
- Stick Highlighter: Stick highlighter comes in a solid stick form, making it convenient for on-the-go touch-ups. It provides a creamy, blendable texture and is suitable for creating targeted highlights on the cheekbones, brow bone, and more.
- Baked Highlighter: Baked highlighters are made by baking liquid formulas until they solidify. They have a shimmery, marbled appearance and offer a highly pigmented glow. They work well for creating a more intense, metallic finish.
- Pressed Highlighter: Pressed highlighters have a firm, compacted consistency. They provide a concentrated shimmer and are known for their intense pigmentation. They are great for achieving a high-impact, blinding glow.
- Powder-to-Cream Highlighter: This unique highlighter starts as a powder but transforms into a cream-like texture upon application. It offers a smooth, luminous finish and is perfect for those who prefer the convenience of a powder with the cream-like effect.
Where to Apply Highlighter on Your Face?
Makeup highlight is supposed to go at the face areas that light naturally hits. That means cheekbones, the temples of your head, the cupid’s bow, the inner corner of your eyes, the brow bone, and your chin.
Cheekbones
When it comes to enhancing your cheekbones, highlighter is the secret weapon. By strategically applying the product on this area, you can create a stunning sculpted effect that brings out the best in your bone structure.
- To apply highlighter to your cheekbones, gently sweep the product along the highest points of your cheekbones using a brush or your fingertips, blending it softly for a seamless finish.
Applying Highlighter on Your Temples
Adding a touch of highlighter on your temples can bring a beautiful glow to your face. Simply sweep the highlighter along the outer edges of your forehead, blending it into your hairline. This technique helps to create a radiant, illuminated effect that accentuates your features.
Highlight the Brow Bone
By applying highlighter just below your eyebrow arch, you create a lifted and more defined look.
It’s a subtle yet impactful technique that draws attention to your eyes, making them appear brighter, bigger and more awake. Highlighting your brow bone enhances your overall eye makeup look.
The Inner Corner of the Eyes
Highlighting the inner corner of your eyes is truly a game-changer in eye makeup.
This subtle technique has transformative effects on the overall look. The strategic placement of highlighter in the inner corners brings a luminous quality to the eyes, enhancing their natural beauty and adding a captivating sparkle.
It serves as a clever trick to draw attention to the eyes and create a more youthful and vibrant appearance.
The Center of the Eyelids
To apply highlighter on the center of your eyelids, simply dab a small amount onto your fingertip or a brush and gently pat it onto the center of your eyelids. This technique will instantly brighten your eyes and make them sparkle.
- Remember to blend it out softly for a seamless finish.
The Cupid’s Bows
Applying highlighter to the cupid’s bow can give your lips an extra glow and shine. To do it, simply take your highlighter and lightly dab or swipe it along the center of your cupid’s bow. This subtle trick will help accentuate your lip shape and create a fuller, more defined pout.
The Bridge of the Nose
Highlighting the bridge of the nose can draw attention to the center of your face, creating a sense of symmetry and adding a touch of radiance. Whether it’s to achieve that coveted “button nose” effect or simply to bring a subtle glow to your face, highlighting the bridge of the nose can be a game-changer.
How to Apply Highlighter Makeup (Step-by-Step Guide)?
Highlighters are known to be messy, especially for beginners, but being a beginner in the realm of makeup is the fun of it, really. You’re only once a beginner, and then you fall in love with it, so good things are what keep being towards you.
Step 1: Prep the Skin
Taking care of your skin should always come before applying any makeup products. It’s a golden rule that emphasizes the significance of giving your skin the attention it deserves.
I know that it’s tempting to focus solely on makeup products only, but skincare is the only way to achieve a flawless and seamless finish, no matter the makeup look.
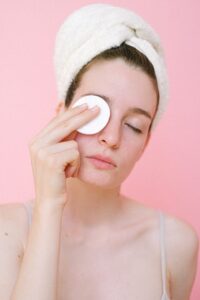
That being said, even if you have a solid grasp of how to apply highlighter as a beginner, if you applied the product right away, I would gently advise you to grab your makeup remover, because no makeup look is worth the wellness of your skin.
Step 2: Create a Makeup Base
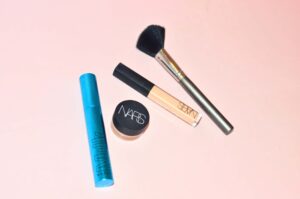
Foundation and concealer help you create a smooth base..
- Foundation is that base for all the products that come after it. It helps in achieving an even skin tone when applied correctly.
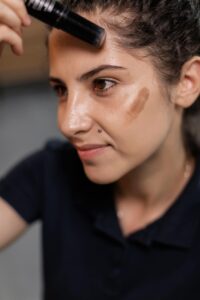
When it comes to the order of applying makeup, highlighter typically comes after foundation, concealer, and contour. However, it’s totally up to you if you prefer to wear foundation or opt for a tinted moisturizer with lighter coverage.
If you’re wondering if you can apply highlighter on bare skin, then yes. However, it’s important to prioritize the first step, which involves applying appropriate skincare.
Step 3: Choose the Right Highlighter
Selecting the right highlighter shade that complements your skin tone is crucial in order to know what kind of makeup look you’re going for.
Opt for shades with a subtle shimmer for a natural glow or go for a more intense highlight for a bolder look.
Step 4: Identify Highlight Areas and Apply the Highlighter
After choosing your highlighter, you want to choose the areas (which we previously discussed) you want to apply the product on.
You might’ve picked up a highlighter brush by now, or you’re using your fingertips, and both are fine to end up with a proper highlighting technique.
You want to start with a small amount of the product, and gradually build up the intensity if needed.
Step 5: Blend and Set
Gently blend the highlighter into your skin to avoid any harsh lines or patches.
To set the highlighter and make it last longer, you can lightly dust a translucent powder over the highlighted areas.
Highlighting Vs. Contouring
When it comes to makeup, contouring and highlighting work in opposite ways. While contouring is all about sculpting and defining the face, highlighting is like adding a luminous touch to your skin.
The key is to choose a highlighter that’s two shades lighter than your skin tone, while for contouring, you go two shades darker.
Although contouring makes a great work on enhancing or preferably downplaying your features, highlighter is usually the unsung hero for the part it plays on face sculpting and adding dimension.
Can I Use Highlighter Alone?
Yes, if you want to go after a neutral-looking highlighting makeup look, you can apply highlighter without foundation or tinted moisturizer. However, it is crucial to apply your primer and moisturizer beforehand.
Can I Use Highlighter Everyday?
Highlighter is a completely safe makeup product and can be worn everyday. Some sparkles never hurt anyone, anyways.
Which Type of Highlighter is Best for Beginners?
As a beginner, I would definitely go for a powder highlighter. This way, you have more control over the application and blending process. In addition to that, most powder highlighters fit every skin type.
How to Makeup Highlight Blue Eyes?
To make blue eyes pop, choose warm-toned eyeshadows like copper and bronze. Add a touch of champagne or gold highlighter to the inner corners of the eyes for extra brightness.


